tutorials
...specifically designed to help you create better image files, to help us make better prints for you!
|
TUTORIAL #6
[VIDEO 6:10] |
|
If you view an image using the "Print Size" option provided by Photoshop, is what you see actually the print size? Probably not, because most users are unaware that they need to take some steps to correct the issue. Just watch this short video and problem solved...
|
|
TUTORIAL #5
[VIDEO 20:57] |
|
Part 1: [6:30]
• Why you should shoot in RAW • Open a RAW file in Adobe “Camera Raw” • Adjust Exposure • Adjust White Balance • What happens when you click on “Open Image” and why you shouldn’t do it... Part 2: [6:05] • Reopen the RAW file in “Camera Raw” • Clean up Colour Noise & Luminance Noise - ‘Detail’ Tab • Remove Chromatic Aberration - ‘Lens Corrections” Tab |
Part 3: [7:05]
• Remove Vignetting - ‘Lens Corrections” Tab • Save the image as a 16 bit, Adobe RGB, Tiff file • Open & compare to previously opened 8 bit file Summary: [1:17] |
|
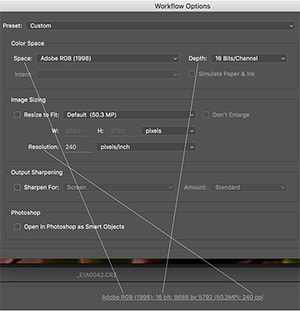
TUTORIAL #4
[ILLUSTRATED] |
|
There are many photographers who do shoot in RAW but don’t realise that, whilst your camera has created a 16-bit file, Adobe have set 8-bit as the default bit depth when you open a file directly from Camera Raw (which makes no sense to me). It follows that these photographers are also unaware that this and the other default settings can be changed or that 16-bit can be selected when saving a file, thus they are starting with 8-bit files which have literally half the information that would be contained in a 16-bit file. (Read more...)
|
|
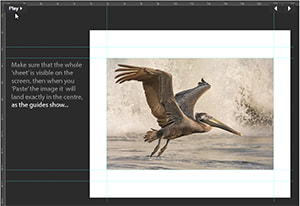
TUTORIAL #3
[ILLUSTRATED] |
|
Traditionally, when presenting a body of work as a suite of fine art prints (and they could be etchings, silkscreen prints, or your digital prints, it makes no difference) either in a portfolio or in frames in an exhibition, it looks more professional and effective when the 'outside' sizes are all the same or at least a limited range of sizes. In turn this simplifies your pricing structure.
However this does not restrict your creativity, there need be no consistency in the the composition and cropping that you choose for the images, which are 'floated' inside the sheet of paper... (Read more...) |
Have you have ever tried to photograph your art yourself or contracted a professional photographer using 35mm equipment to photograph it for you, only to find out that the images won't enlarge to the size you were hoping for without an unacceptable lack of sharpness and resolution? Art reproduction is very specialized process not fully understood by most professional photographers who doubtless believe, if they haven't tried it before, that it will be just another assignment... (Read more...)
|
TUTORIAL #1
[ILLUSTRATED] |
|
Do your prints always come out looking too dark compared to your monitor image? If so it's because your monitor is set too bright, perhaps to 'gaming' & 'video' standards that are are around 400% the brightness of paper based print values! You might then compensate by darkening your images so they look OK on your uncalibrated screen and then send those 'darkened' images to your printer. No good. Your prints will only match your screen when your monitor is correctly adjusted for printing...
(Read more...) |